- Home
- Knowledge library
- Field drainage: How to map field drainage systems
Field drainage: How to map field drainage systems
Fields may already have some form of drainage. Find out how to identify any system present with a drainage plan or field observations.
Typical drainage layouts
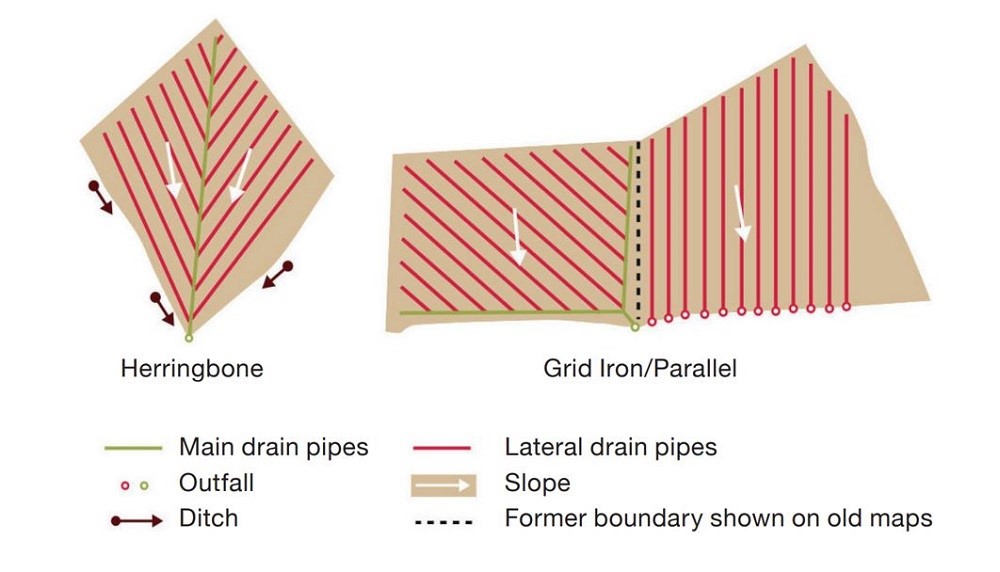
A field can contain a combination of layouts or be drained irregularly, depending on surface slopes.
If smaller fields have been merged, the outfalls may be found at the low points of each original field.
Examples of ‘typical’ field drainage layouts
Final drainage plans
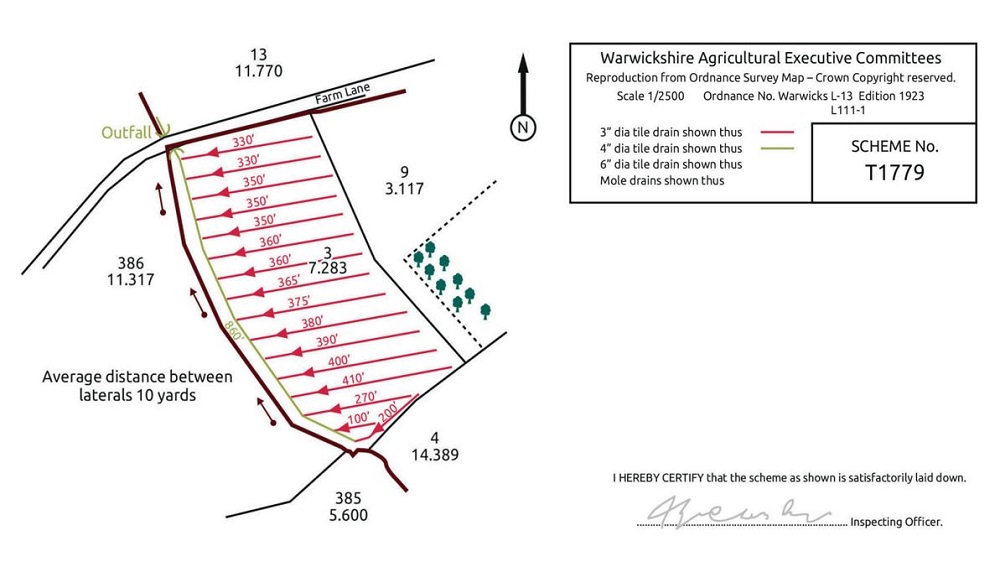
Final drainage plans detail the type of drainage and where it was installed. They often include key above-ground features, which can be used to help locate drains.
However, ensure you use final drainage plans, not proposals. A final plan may include the words “completion” or “as built” and should always be signed.
If you do not have a final drainage plan, contact local drainage contractors, as they may hold copies.
If the land has been recently acquired, the previous owners may hold the plans.
An example of a final field drainage plan
 AHDB
AHDB
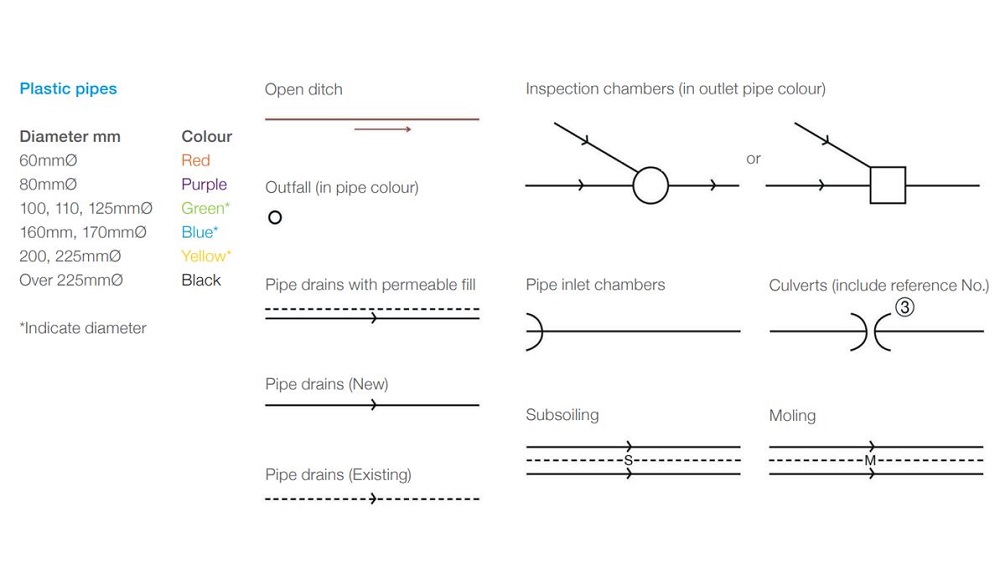
Standard colours and symbols
 AHDB
AHDB
Creating your own drainage plan
In the absence of a drainage plan, use observations to create your own plan. Any information is better than no information.
1. Produce a basic map
Start with an outline of the field and surrounding area.
Record any ditches and the direction in which they flow, along with the dominant direction of slope.
Mark any removed field boundaries or ditches, as one large field may contain several small drainage schemes.
2. Locate any visible outfalls
- Outfalls are generally found at the lowest points
- Walk the ditches after rainfall, as you may hear an outfall running that you cannot see
- Look for outfalls in the winter when drains are running and vegetation growth is reduced
- Even if a pipe is not visible, seepage from the bank or an area where the bank has receded can indicate the location of a drain outfall
- If the ditch is badly overgrown, it may be necessary to clear vegetation
- If the ditch has become silted up or the pipe blocked, the ditch may first need to be cleared – typically, to at least one metre below the adjacent field level
3. Look for field surface signs
Some features may only be apparent in a certain light or ground moisture conditions.
- Aerial photographs (available online) may reveal the lines of the drains, although they may be confused with other features, such as underground pipelines
- Slight linear depressions may be visible on the field surface
- The crop may vary in quality or colour over the line of a drain
- The soil may be drier directly over the drain than between drains
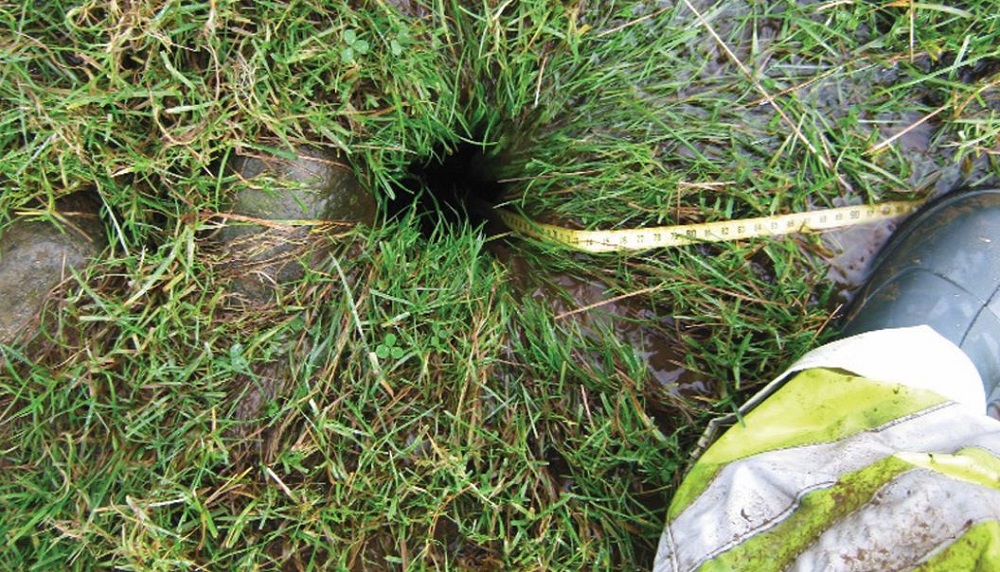
- Localised wet areas or small depressions (‘blow holes’) may be found upslope of a blocked drain
A ‘blow hole’
 ADAS
ADAS
4. Dig trenches
If the outfall cannot be found by visual inspection or surface signs need to be confirmed, consider digging trenches across the most likely locations for drains.
Before excavating any trenches, ensure that:
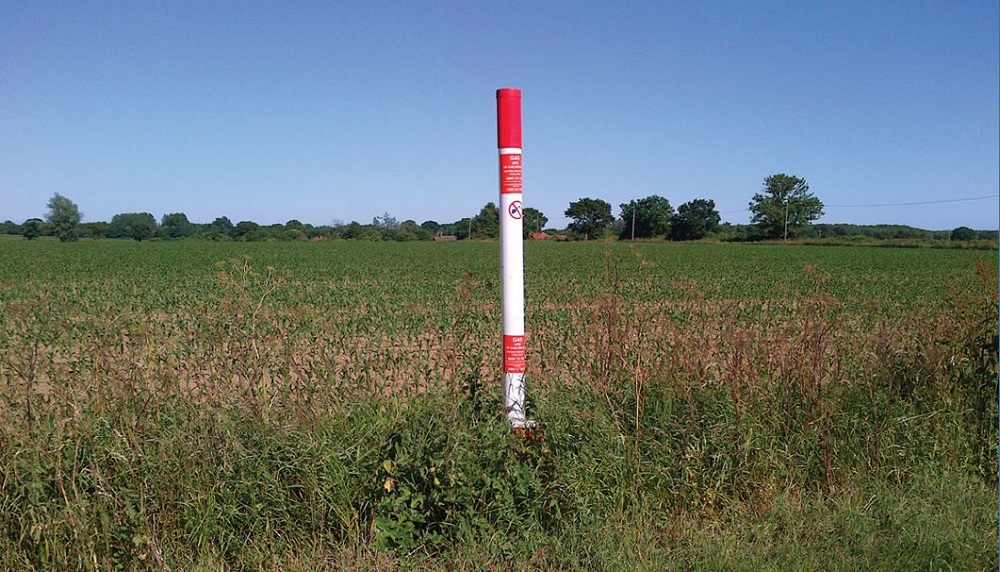
- There are no underground cables or pipelines present that may be hazardous or be damaged
- No one enters a trench unless adequate precautions have been taken to prevent collapse
Look for signs of hazards
 AHDB
AHDB
Topics:
Sectors:
Tags:

